How I shoot
I get a lot of emails from people asking me what settings I used in a particular picture or what settings I commonly use or recommend someone to use. I have written a lot of long emails replying to people so I figured it made more sense to do a write up here that I can refer people to. I found when I first got into photography a lot of explanations try to be all encompassing and by doing so ended up providing a lot more information than I actually wanted and needed. I think the first camera book I read was 500 pages or so of very detailed technical information. It explained a lot of 'what' but very little 'why'. This tendency of authors to fill pages upon pages with very detailed technical information often frustrates readers causing them to lose interest before they have learnt what they started out to understand. Here I will try to explain what settings I use and why I use them.
File Formats
The first thing you have to decide is what format do you want to shoot. Most cameras offer different sizes of JPEG and several sizes of RAW files. I shoot RAW files without exception. There a lot of benefits of shooting RAW that significantly outweigh any downsides. RAW files capture the most amount of information available from your camera's sensor allowing you a tremendous amount of options in post processing.
To process a RAW file, and ultimately convert it to JPEG for broader consumption you will need to use an application that can process RAW files such as Adobe's Lightroom (which I use) or Apple's Aperture. You can change white balance, brightness, contrast, and a whole host of other things non-dystructively meaning that you can make the change and then change your mind and change it again. This is especially helpful if weeks, months or even years later you repurpose a photograph and need to make changes. The changes never impact your original file as all 'settings' are written to a side file, including settings you set in your camera.
I typically do very little, if any, post processing on my photos but if I need to tweak white balance, exposure or remove dust I want to be working with the highest quality file. Here is an example of the controls in Adobe's Lightroom.
There are a couple of trade offs you need to make when shooting raw. First the files are huge. Mine are about 35MB per photograph. This means you need to buy extra memory cards and have plenty of storage both of which are getting cheaper all the time. When shooting my Leica and x100 I typically carry four 8GB 20MB/sec memory cards with me. I use to use larger but I find the Leica performs better on smaller memory cards. For storage at home I have five 2TB Western Digital My Book Drives. I also have 2 500GB portable Western Digital drives I carry with me when I am traveling as I backup daily to ensure I never lose data.
One other trade off with RAW is your previews can tend to look flat on your camera's LCD screen as there is no processing happening in the camera. I tend to not use my camera's LCD to evaluate my pictures other than ensure my framing was correct.
White Balance
One topic that can be a little confusing is white balance. What you need to know is there are color casts at different times of the day and with different sources of light that can cause the colors in your photos to look off such as too blue, green or yellow. Typically you can see this in the tone of the skin of whoever you are photographing. Here is an example of some shots where the White Balance is not correct.
The goal of white balance is to make sure that colors are rendered correctly like in the last picture in the frame. I typically leave my camera on Auto White Balance as my Leica does a very good job of handling and balancing White Balance. This works for about 99% of my shots. There are times when the lighting is a little more difficult such as having mixed lighting sources such a house lights, light coming through a window and a flash for example. In this case I might use my X-Rite Color Checker password to help me correct my White Balance and ensure colors are rendering properly. Basically you take a photograph of this in your scene then can set a camera profile in Lightroom. I use this each year when we should our family photos at Christmas.
For me those are the two big decisions you need to make in terms of settings in the camera, everything else is made while shooting. Now let's review the principles of exposure together. We so have a couple of variables to control our exposure and how light hits our camera's sensor; ISO, Shutter Speed and Aperture.
ISO – In film photography this determined how sensitive your film was to light. In the digital world it is how sensitive your camera’s sensor is to light. The higher the ISO the more sensitive your camera will be to light, but this comes at the cost of adding digital noise into your pictures and often at the cost of image quality.
Shutter Speed – This is how long you leave your shutter open thus how long you allow light to hit your camera’s sensor. You can use this to freeze or imply motion depending on the photograph you are trying to create.
Aperture – How much light you let pass through your lens and onto the sensor. This also controls depth of field or how much of the photograph is in focus.
With time and practice these settings and the outcomes become second nature to you. It simply takes time and practice to learn how to combine them together to get the effect you are looking for. Understanding this isn't the end all of photography but rather the beginning. These are simply tools to help you achieve the outcome you are looking for.
ISO
ISO or film speed was it is know in Film Photography determines how sensitive your film, in the the digital world your sensor, is to light. When shooting at night you might need to increase your ISO so you have a proper exposure but this comes at the expensive of image quality. Below are some examples of the impacts of increasing your ISO on image quality. You can see as your increase your ISO you are also increasing the digital noise in your photograph.
I want the highest quality images possible so I keep my ISO on my Leica at Pull 80 most of the time. I will sometimes increase it to 400 but usually I don't like to go much beyond that. Different cameras have different abilities of dealing with high ISO. My Canon 5DMKII for example is extremely good at creating high quality images at high ISO. My basic rule of thumb is I only raise my ISO as a last resort. There are also creative uses for ISO as sometimes you want to add grain into a photo such as shooting a city at night in Black and White.
Shutter Speed
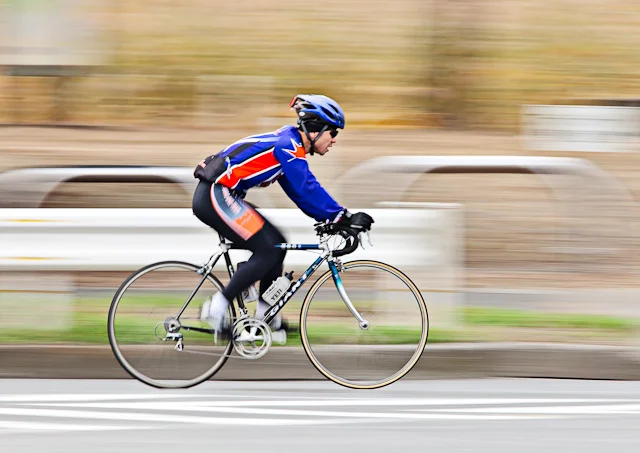
The next part of exposure to understand is Shutter Speed. This is simply how long you allow light to hit your sensor. The simple question you need to answer is do you want to freeze motion or imply motion? Maybe a taxi is driving by such as in the picture below and you want to stop it and freeze it razor sharp. You would need a very quick shutter speed such as 1/1000 or 1/750 of a second to stop the taxi. Perhaps you want to show that a scene you are looking at is very busy and you want to imply motion by capturing the blur of the taxi as it races by so 1/10 of a second might be a better choice. You can see in this example at 1/750th of a second we could freeze the taxi keeping it sharp and as we slow our shutter speed down to .7 of a second the taxi is all but a blur.
There is no right or wrong with shutter speed but simply what is the effect you want to create. One consideration you need to think about with Shutter Speed is camera shake. At a certain point either the movement of your hands or the pressing of the shutter and cause a slight shake that can be visible with the camera. There are all sorts of rules of thumb out there but basically if you are shooting at a shutter speed of less than 1/50 of a second, you should be considering using a tripod to avoid camera shake. Other things you can do to avoid or reduce camera shake is using a soft release button or a timed release so the camera has time to stabilize after you put the shutter and before taking the picture.
Aperture
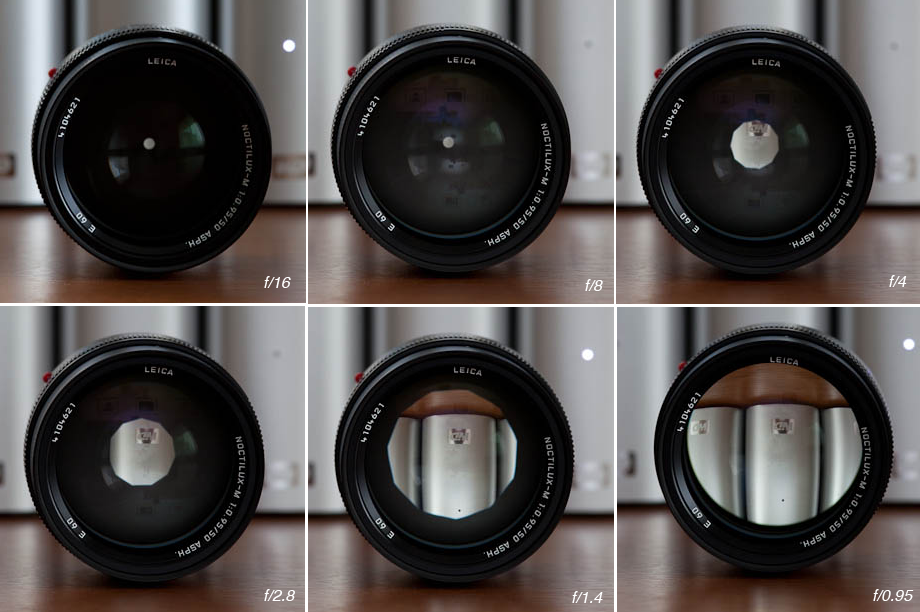
The last part of exposure and the one I tend to leverage the most is Aperture. Aperture refers to the size of the diameter of the lens. The larger the f stop the smaller the opening. This is counter-intuitive and can be confusing. Typically the smaller the f-stop the brighter the lens. This is often also considered a better lens as well due to the versatility and creative potential of the lens. Lenses with large f-stops such as 1.4, 1.2, 1 and .95 are called 'fast lenses'. I tend to buy fast lenses when possible. Aside from the creative potential they are great for night shooting.
The creative part of Aperture is controlling what is called Depth of Field, or how much of your photograph is in focus. Look at the pictures below;
at f/2.8 only the figure is in focus, you can't really even make out the disk drives behind him.
at f/8 the figures behind him are beginning to become sharp
at f/32 everything is sharp and you can clearly read the labels on each drive.
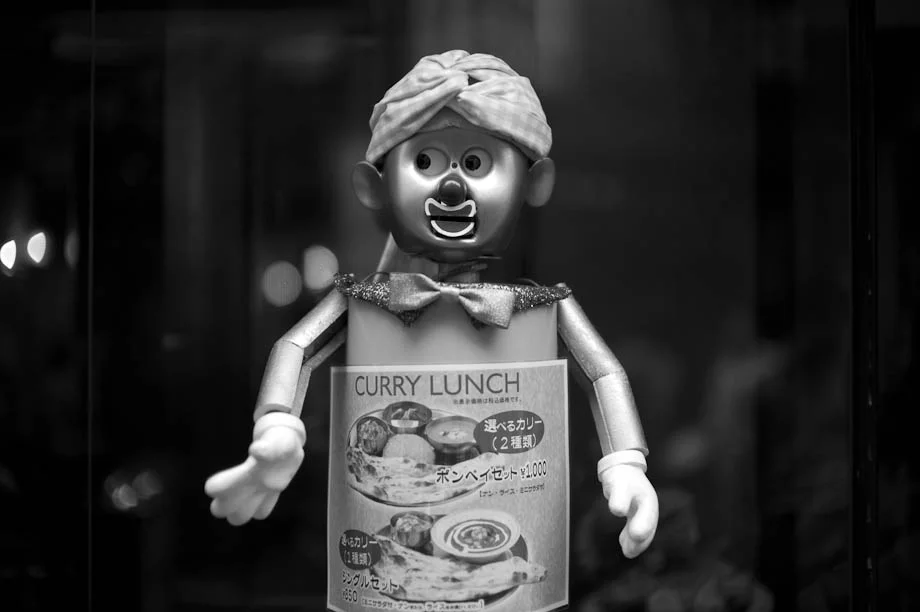
I tend to favor selective focus so I typically shoot with a big aperture. The creative options here are really endless.
Lastly focusing... I always focus manually as you simply get much better images, especially if you are shooting at a big aperture like I like to. The opportunity for error is too big.
OK so how do we put this all together?
File Format - Raw
White Balance - Auto (most of the time)
ISO - Leave it on the lowest possible
Focus - Manual
This leaves us with a few questions we need to answer: Are we trying to imply or freeze motion? Do we want to selectively focus on a certain subject or capture a lot of detail from front to back? I typically let the answer to these be the primary driver of the setting I use. For example; if I am looking isolate a sign I will choose a big aperture such as f/1.4 or f/2. I have my ISO locked on pull 80 so all I need to do is adjust my Shutter Speed for a proper exposure. If I am trying to capture the trail lights of a car for example, I might set my shutter speed to 2 or 4 seconds and then adjust my aperture for a proper exposure.
I am shooting in manual mode most of the time. If you are struggling with shooting in Manual Mode try using Aperture Priority or Time (shutter speed) Priority. In these modes, you set the priority, Shutter Speed or Aperture and the camera will set the other settings accordingly for a proper exposure. Once you have the shot you want with Aperture Priority or Time Priority, you can switch to Manual mode and you can tweak from here. Just remember that each setting f/1.4 at 1/90, f/2.8 at 1/60, f/5.6 at 1/15 and f/11 at 4 seconds are all proper exposures but all will give you very different looking photos depending on the creative outcome you are looking for. Find a subject and practice on the various settings to see how different of a result you can get.
I hope you found this helpful. If there are other topics you want me to cover, please drop me a line or leave a comment. As you start to learn the fundamentals you can apply them through some of these 10 lessons I learnt from daily shooting.
If you like what you saw today, please share it by clicking one of the links below. Thanks and see you tomorrow!


