Correcting White Balance
Color is one of the most powerful and important elements in your photograph. Color can draw a viewer toward your photograph. Color can involve an emotional response from your viewer. Color engages them. The ability to render color correctly is often the difference between a good and a great photograph. Correct color all starts with having a correct White Balance.
Certain types of lights can cause cameras to record a color cast. A colour cast is a unwanted tint of a particular color which affects your entire image evenly. Our eyes and brain have the ability to adjust for the different types of light in ways our cameras cannot. Typically you compensate for this in your camera by adjusting your white balance but sometimes your camera gets it wrong.
I was shooting this picture of the Leica M8 that Leica Ginza loaned me while they are working on my M9. It is a good image well composed, sharp, clean edges...but something is off. Anyone who knows Leica knows that the metal is more 'steel' colored and does not have this 'brownish' tint to it. This time my camera got the White Balance wrong. This happens often in my home office. I am not sure if it is caused by the tungsten lighting or it is picking up the cast from something else in the room. This can be easy to notice if you got a single shot wrong but it can be very difficult to notice if you have taken a series of shots and they all have the same issue.
OK, we have hit this issue now how do we go about fixing it? One tool I use often is the X-rite Color Checker Passport. It is a color calibrated target that you can use in your digital work-flow to adjust and accurately render colors. Take a photo of the target in the same lighting conditions as the image that you are going to correct.
Import the image into Adobe Lightroom along with the rest of your images from the shoot. You can use the Eye Drop tool...
...to select the center neutral gray color on the target.
Now the color cast has been removed from your image.
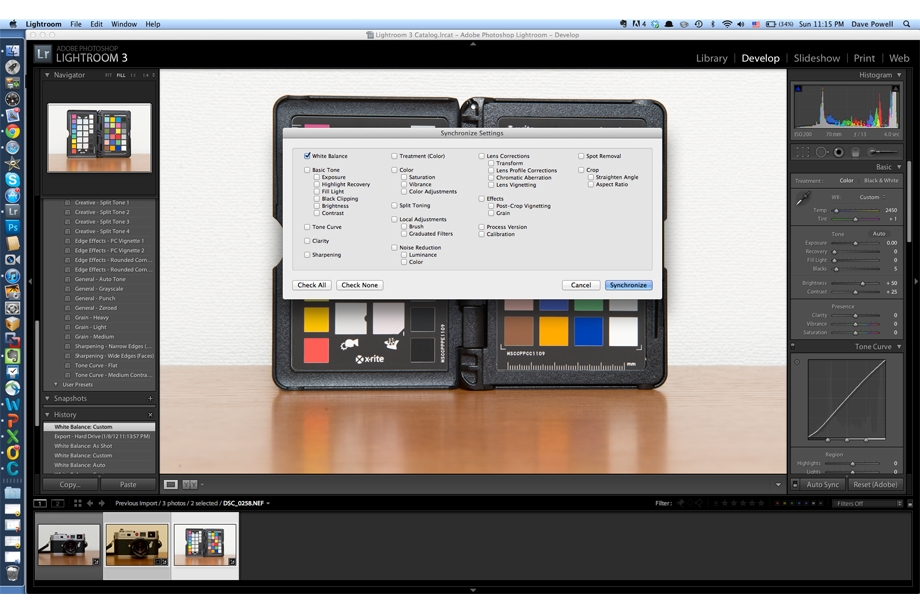
You can now synchronize your 'custom' white balance setting with other images in Lightroom.
and now you have correct white balance!
Have a look again at how bad the color cast really was... I might have easily let that image go without a second thought if I didn't stop to consider color. Like I said above, it is really easy to overlook this.
What if you don't have a Color Checker Passport or didn't get a picture of it? You can still correct your image's White Balance. Grab the Eye Drop tool and look for what you think is a neutral light gray color in your image. In this case I think the letters painted on the lens are my best shot...
Choosing White Balance in Lightroom with the Eye Drop tool
In this case it actually came really close to the correct white balance.
I hope this was helpful. If you like what you saw today, please share it by clicking one of the icons below...


